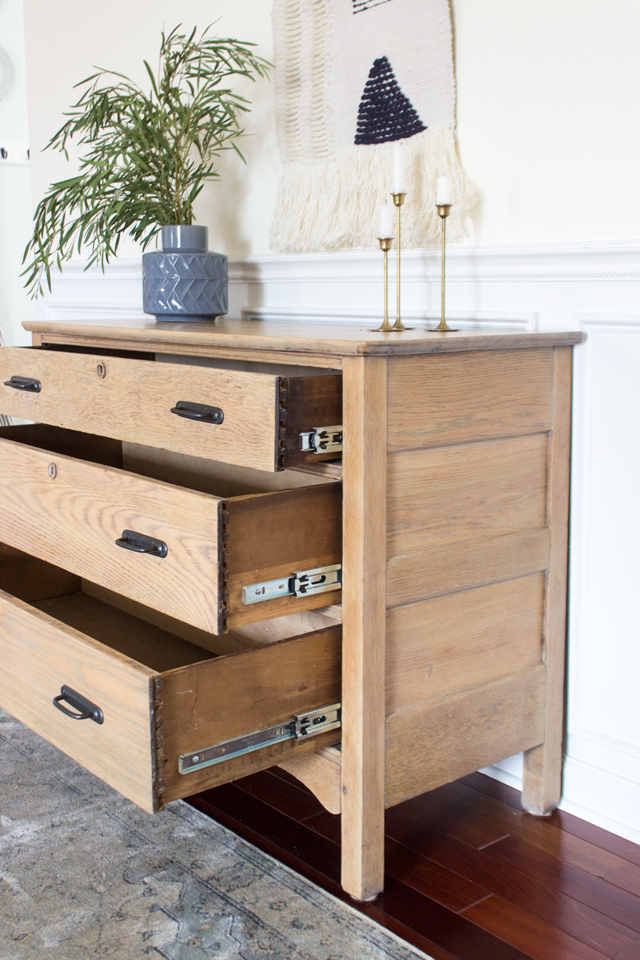
Every bit promised, today I'm sharing how to install drawer slides on a vintage dresser. This is a bang-up way to give an quondam dresser new life, especially if y'all programme on using it a lot and take been frustrated with glutinous or sagging drawers.
To see this finished dresser and stain details go Here.
Dorsum a few years agone when I used to refinish dressers and sell them, the nearly common complaint I used to hear from people regarding one-time, antique, or vintage dressers were the drawers. Because most of them had wood drawer slides, over time and with different environments, the wood would wear down. This acquired them to not slide smoothly, stick, sag when you lot pulled them out all the way, and were overall a hurting if yous used them a lot. Most people who fell in love with an older slice accepted this as the 'character' of older dressers. I tend to concord. Simply for those who dear the look of vintage dressers simply love the functionality of new dressers, this tutorial will help yous achieve that!
In my opinion the best type of drawer slide to install and use is metal ball-bearing drawer slides. They are more than durable and easier to install, making their higher price point well-worth information technology.

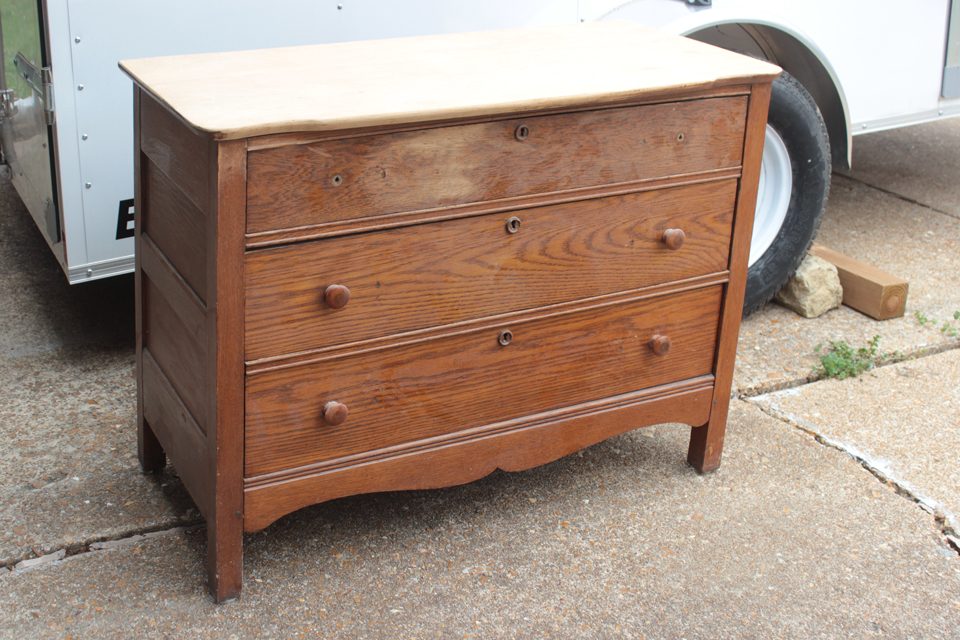
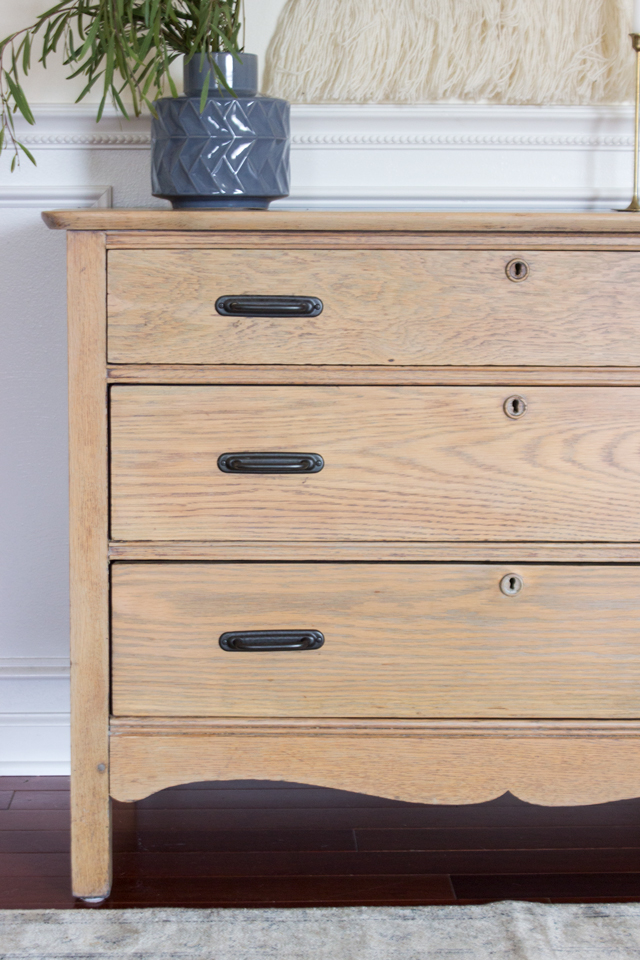
Equally you may retrieve from my previous post, this was the dresser as she started out:
Tools You Will Need:
Chisel
Mallet
Circular saw
Measuring tape
Pocket pigsty jig
Hammer (or cordless brad nailer)
Cordless drill
Level
1/16″ Drill scrap
Wood clamps
Supplies You Volition Need:
-1/ii″ plywood (I used a one/iv sheet for all 3 drawers that is 2′ 10 4′)
ane″ pocket hole screws (eight for each drawer)
1″ nails
two×4 fleck to cut woods shims
-Brawl-bearing metal drawer slides (purchase the length as the depth of the drawers– 12″ long ones are found at WoodCraft and Amazon)
-1×3 boards cut to drawer depth (I used almost half-dozen′ on this dresser)
-ane″ wood screws (for attaching to drawer confront)
-1 one/2″ woods screws (for attaching 1x3s to side of dresser)
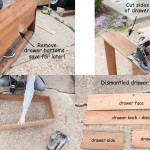
Step 1: Remove Old Drawer Slides
Using a chisel and mallet remove the sometime wooden drawer slides from the inside of the dresser.
Click thumbnail below to see larger picture collage
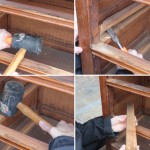
Or come across animated GIF below:
Pace 2: Dismantle Old Drawers
Slide out the drawer lesser (may have to remove nails with a hammer) and if it'southward in proficient shape, salvage it to reuse. Use a circular saw to cut off the sides from the drawer face. Pry apart the sides from the back. Cut off tenons from drawer sides and discard the drawer back.
Click thumbnail below to see larger moving-picture show collage
Step 3: Re-build Drawers
Measure the length of the drawer face and the height of the drawer sides from the routed groove. Cut the one/2″ plywood to that same top and 2″ less than the length of the drawer face up. The reason why y'all want the length different is because the metal drawer slides crave 1/2″ clearance on either side of the drawer carcass. You as well will be attaching the new 1/2″ plywood betwixt the two drawer sides (which are one/2″ thick), then you take to subtract their thickness likewise from the total length of the plywood front and dorsum (hence 2″). Drill ii- 1/2″ pocket holes on either end of the plywood pieces and attach them to the drawer sides using i″ pocket hole screws. Pre-drill and spiral into place the new plywood drawer front into the back of the drawer confront. Slide the drawer bottom dorsum into identify (into the routed grooves on the side pieces) and nail into the front and dorsum using i″ nails.
Click thumbnail below to run into larger flick collage
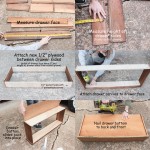
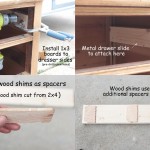
Step 4: Attach Drawer Slide Spacers
Using a clench and a level, position the 1×3 boards on the inside sides of the dresser for each drawer opening. Adhere them using one 1/2″ wood screws into (pre-drilled holes– important to always pre-drill holes into former wood then it doesn't split).
You may need to apply some forest shims (from scrap 2×four) to get the board to exist the correct thickness. The clearance on each side of the drawer can only be 1/two″ for the metal drawer slides to fit and work properly. And so, you lot need the wood on each side to be the right thickness so the attached metallic slide sticks out far enough. The one×3 is three/4″ thick then wood shims tin can add an additional 1/16″ or one/8″ or 1/4″ thickness depending on what you lot need. I attached the 1x3s offset, installed the metal glides on the drawer and inside and then measured to see how thick I needed my forest shims to be (I used 1/8″) on each side and added appropriately.
Click thumbnail below to see larger moving picture collage
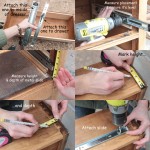
Step v: Install Drawer Slides
Measure and mark level the position of the slide that goes on the inside of the dresser. Attach with the provided screws. Slide into place the office of the slide that goes on the actual drawer. Mark the meridian and depth of that part of the slide from the opening and make corresponding marks on the outside of each drawer side. Attach the function of the slide that goes on the drawer and test fit information technology into the drawer opening. Information technology is normal to take to make some adjustments. The slides need to be level and straight (on both the outside of the drawer and the inside of the dresser and they both have to be positioned the same depth on both sides in order for the drawers to slide in and out smoothly.
Click thumbnail below to see larger moving picture collage
If y'all would similar to know how to strip wood finishes, you tin can cheque out
my tutorial on how to refinish a wood dining table here!
To see this completed dresser along with the products and method I used to stain it, go to
my post on this vintage dresser with a modern makeover!
If you liked this tutorial, be certain to share it!

DOWNLOAD HERE
How to Make a Wooden Drawer Slide Better TUTORIAL
Posted by: johnniemuder1969.blogspot.com


Commenti
Posta un commento